Choosing the right primer before tiling depends on the type of substrate and the level of performance expected. Site conditions can vary, and using the appropriate primer helps ensure proper adhesion, controlled drying, and reduced installation risks.
Solutions such as GRIP A500 MULTI and GRIP A936 XPRESS are designed to work across a range of substrates. They help simplify surface preparation while supporting consistent results on site.
Why priming is a key step before fixing floor tiles
Priming prepares the substrate to ensure proper tile adhesion and long-term durability. It stabilises the surface and creates the right conditions for the adhesive to perform consistently.
On absorbent substrates, primer regulates suction and prevents the adhesive from drying too quickly. On smooth or dense surfaces, it creates a bonding layer that improves grip where adhesion would otherwise be limited.
It also helps bind fine particles at the surface and supports mookre even curing of the adhesive across the area.
Without this step, issues such as poor bonding, uneven curing, or tile detachment are more likely to occur. Proper priming helps reduce these risks and contributes to a more reliable installation.
Spotting the surface type: porous or non-porous?
The way a surface absorbs moisture directly affects how the adhesive behaves.
Porous substrates such as concrete, cement screed, anhydrite screed, or plaster-based compounds absorb water quickly. Without a primer, this can cause the adhesive to dry too fast, which may affect bonding and curing.
Non-porous surfaces behave differently. Existing ceramic tiles, terrazzo, some types of natural stone, or synthetic flooring have little to no absorption. In these cases, the challenge is not drying speed but adhesion. Without proper priming, the adhesive may not grip the surface effectively.
In practice, surfaces are not always uniform. Variations in absorbency can occur even within the same substrate. Taking the time to assess the surface helps avoid installation issues and ensures compatibility between primer, substrate, and adhesive.
Surface identification is the first step in selecting the right primer. Site conditions vary, and even standard materials can show inconsistent absorbency. Accurate assessment helps avoid adhesive issues and ensures compatibility between primer, substrate and adhesive.
What primer to use before tiling: matching surface and product
For porous surfaces
On porous substrates, controlling absorbency is essential to ensure consistent adhesive performance. Materials such as concrete, cement screed, or anhydrite can draw moisture quickly, which may affect curing if not properly managed.
GRIP A500 MULTI is designed to regulate suction and create stable conditions for adhesive application. It can be used on both standard and highly absorbent substrates, helping to maintain a consistent drying behaviour across the surface.
The product is compatible with tile adhesives and levelling compounds, and can be used in both indoor and outdoor environments. It is typically applied with a roller or brush, depending on site conditions.
Drying time before over-coating is generally between 30 minutes and 3 hours, depending on substrate absorbency, temperature, and humidity. On highly absorbent surfaces, a second coat may be required to achieve uniform coverage and avoid issues such as air bubbles or uneven drying.
With an average consumption of around 75 g/m² and a very low VOC classification (EC1 Plus ¹), it supports efficient application while meeting indoor air quality requirements.
For non-porous surfaces
Smooth and dense substrates require a different approach, as adhesion can be more difficult to achieve. Surfaces such as existing ceramic tiles, terrazzo, synthetic flooring, or certain natural stones offer little to no absorption, which limits the bonding capacity of standard primers.
GRIP A936 XPRESS is designed for these conditions. It creates mechanical grip on the surface, thanks to its quartz content, which forms a textured layer once applied. This makes it particularly suitable for renovation work, where new tiles are installed over existing dense substrates.
The product is applied evenly with a roller, avoiding excess material or puddles. Drying time typically ranges from 30 minutes to 3 hours, depending on ambient conditions and the substrate. Once dry, the surface is ready to receive tile adhesive or a levelling compound.
With its EC1 Plus ¹ classification, it also supports low-emission indoor environments while providing a stable and reliable base for tiling.
| 1 EC1 Plus (Emicode) |
|---|
| EC1 Plus is a classification issued under the Emicode system. It confirms very low VOC emissions from construction products and supports indoor air quality requirements in regulated buildings. |
Key application tips to get the best finish
Proper preparation is essential to ensure the primer performs as expected. The substrate should be clean, dry, and free from dust, grease, or old adhesive residues. Any weak or unstable layers must be removed before application.
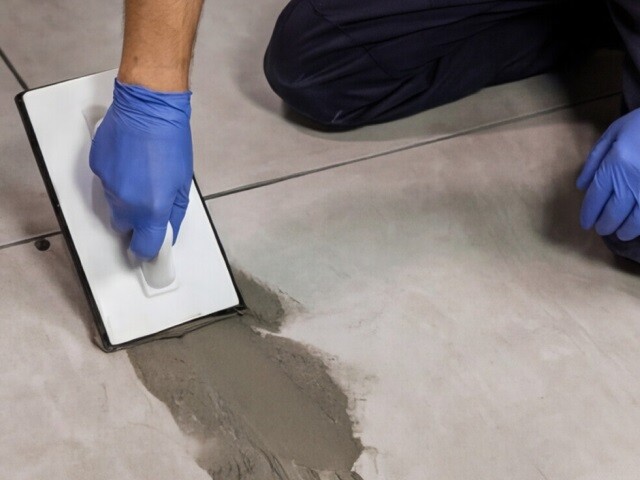
The primer should be applied in a thin, even coat. Using a short-pile roller or brush helps control the amount of product and avoid over-application or puddles, which can affect drying and performance.
Drying time may vary depending on site conditions. In colder or more humid environments, allowing additional time before over-coating helps ensure the primer has formed correctly.
On highly absorbent substrates, a second coat can improve coverage and help prevent issues such as air bubbles or uneven adhesive curing.
For installations with underfloor heating, systems should be switched off at least 48 hours before application and restarted gradually after installation.
Special conditions: underfloor heating
When working on surfaces with underfloor heating, specific precautions are required. The system should be switched off at least 48 hours before applying the primer to avoid affecting drying and adhesion.
After installation, the heating should only be restarted gradually, typically after a minimum of 7 days. This helps prevent thermal stress on the freshly applied system and supports proper curing.
Working conditions and performance
Drying time and overall primer performance depend on site conditions. Temperature, humidity, and the condition of the substrate all influence how the product behaves and when it is ready for over-coating.
To ensure consistent results, application should always follow the recommended temperature ranges. Substrates must be dry and meet moisture requirements before priming, as excess moisture can impair adhesion.
Applying the primer in thin, even layers helps achieve proper film formation and avoids issues related to over-application or uneven drying.
Compatibility with adhesives and systems
Primer selection must be compatible with both the substrate and the adhesive system used. This ensures that each layer of the installation works together as intended.
GRIP A500 MULTI and GRIP A936 XPRESS are designed to work with Bostik tile adhesives and levelling compounds when applied in accordance with their technical data sheets.
Matching the primer with the substrate and adhesive system supports reliable adhesion, consistent curing, and long-term durability. For detailed guidance and system recommendations, Bostik Academy provides additional technical resources.
Primer compatibility with adhesives and tile types
Primer selection should always be compatible with the intended adhesive system and the type of substrate being prepared. GRIP A500 MULTI and GRIP A936 XPRESS are designed to improve adhesion of tile adhesives and levelling compounds when used on suitable substrates in accordance with the technical data sheets.
GRIP A500 MULTI and GRIP A936 XPRESS are designed to work with Bostik adhesives and levelling compounds. Their performance aligns with site conditions commonly encountered on both porous and non-porous substrates. Reliable adhesion depends on matching primer and adhesive based on substrate condition, product formulation and drying time.
For technical details, substrate compatibility, and application recommendations, access full resources on Bostik Academy.
Related articles
Discover articles that explain, educate, and inspire for better constructions